Table of Contents
How to Migrate my WordPress Site to a new Domain extension was something that i have always wanted to find out but investigation always led to expensive software or complicated procedures. I wanted to migrate to the .COM address but it was not available at the time of setting up my site so I settled on the .NET one instead.
When the .COM eventually become available and the domain capture I placed via my Web Hosting Provider (Heart Internet) snapped up the domain for me and I now own home-mining.com
I can now migrate my WordPress site from .NET to the newly obtained .COM. My investigation was long and always resulted in expensive plug-in that were going to cost me $$$ so I came up with this solution
https://www.home-mining.net WordPress Site needs Migrating to https://www.home-mining.com

How to Migrate/Backup WordPress from One domain to another?
Firstly, we need to prepare the sites for migration, this involves the following:
- Update the source (home-mining.NET) site to latest WordPress version
- Delete any unused plugins from source site
- Disable any Backup, Security, Firewall or caching plugin on the source site
- Install and update the destination (.COM) site to latest WordPress version and use the same admin and password accounts as source site.
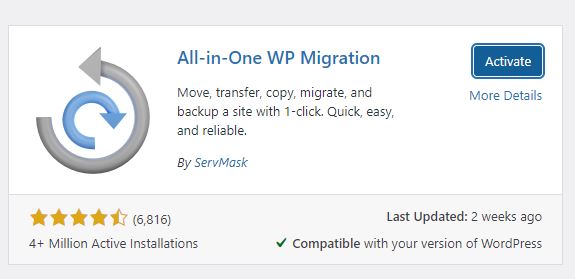
- Install All-in-One-WP Migration plugin on source and destination sites and activate
- Set Both sites to use at least PHP 7.3. This can be done by your hosting provider or on editing the .htaccess file at the root of your site (This works great on my Linux sites)
- Add the following to .htaccess
AddHandler application/x-httpd-php73 .php
RLIMITMem Max

How to Export/Backup your WordPress site
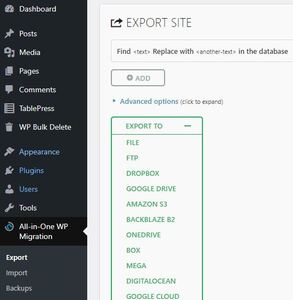
- On the source site navigate to “All in one WP Migration” Plugin and in the Export Options, choose “Export to a file”, this may take a few minuets
- Once The Export is complete it will ask you to download the file to a local drive. Save the file to your local drive, We now have a locally stored file.
- When you complete the export, take note of the file size, mine is 527Mb


How to Migrate/Import your WordPress site to the new location
- Now on the destination site (.COM) navigate too the “All in one WP Migration” Plugin and the Import Option.
- Be aware of the “Maximum upload file size: 64 MB.” Message. As my site is around 540Mb we will need to fix this first.
- We will need to update the php.ini in the root of our site. If you don’t have one then create one using notepad and upload to the root. This can be achieved via a FTP app or a WP plug-in

Update your php.ini file with 2 new lines upload_max_filesize = 600M post_max_size = 600M
- I will set mine to 600MB to cover the 540MB of my site. We can now refresh the page and the upload size should have changed to 600Mb. If it doesn’t you will need to consult with your hosting provider as they may handle your site setting differently to mine.
- Click on Import From – File and select the file you downloaded from the source site
- DO NOT close your browser at ANY stage during this process
- The site will now import, this will take longer than the export, be patient
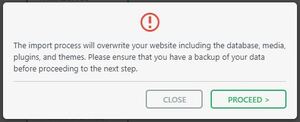
- Once the first stage is completed it will ask you to confirm the procedure. Click Proceed
- The Restore will continue.
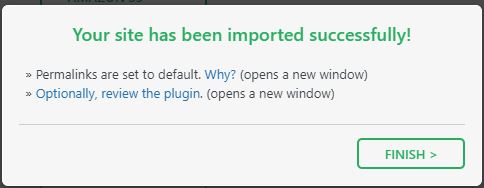
- On completion you should receive the following message
- Refresh your webpage and your site should now load on its new hosting location
What to do AFTER you have migrated your site to a new location
After a successful migration we will need to complete a few steps to get the new site back to normal
- Set the php.ini file back to original memory settings by removing the 2 lines we previously added in php.ini
- On the first login to the new location, you will need to confirm your admin email address again
- Reset WordPress Permalinks. Navigate to Settings > Permalinks. And set to “Post name” I believe this is best for SEO purposes
- Reactivate your plugin one by one and confirm they still work. Some may need to be deleted and installed again.
- Caching, Backup and Security plugin may need a refresh of settings and passwords, cache cleared etc
- Install a SSL certificate if you don’t have one on the new domain.
- Create a new Admin account, named something unusual and delete the default “admin” account. Default accounts are what hackers try first.
- Check site for any broken links or hard coded links using the old domain name and fix them.
- Submit your new site to Google
- Add new Site to Google Analytics
That should now complete the site migration to its new home. This method can be used to migrate sites from one domain name to another or even from one hosting provider to another. The limits are only that of your imagination


