Table of Contents
This will be a complete stage by stage CSPN 2.0 Masternode Setup Guide to help you get the NEW (June 2020) and massivly improved CSPN Masternode online. It differs quite a bit to the older version and the PIVX style nodes you maybe used to so its worth going stage by stage and reading carfully before comminting to each step.
This new wallet comes with some great new security improvements including a NEW Governance feature that allows Masternode owners to have a community vote on the project. The wallet itself is based off the DASH Coin core code and so you know its going to be good. For those of you that dont know DASH, its the master of Masternodes and is a PoW aswell as PoS coin. It was the first Masternode coin and currently holds the most value. DASH was a fork from Bitcoin and was original called Dark Coin.
How do i install a Windows CSPN Wallet?
Fisrtly you need to download the new CSPN 2.0 wallet, you will find this on Github but as updates are enevitable its best to follow the link from the Crypto Sports Network (CSPN) Website Select “Wallets” from the top right menu. This way you always get the latest version, or you can check the CSPN Discord page
The wallet will be in a ZIP file, so once downloaded open the Zip file and you should have 4 files inside. Copy these out into a newly created folder called “CSPN2” then create another folder inside called “Data” (you can name this what ever you like, Blockchain may also be fitting). I set my wallets up like this so they are not mixed with other windows apps and are easy to get too.

Now run the “cspn-qt” EXE to start the wallet for the first time, it will prompt you for the path for the CSPN Blockchain to be downloaded too. Select the Data folder inside the CSPN2 folder.

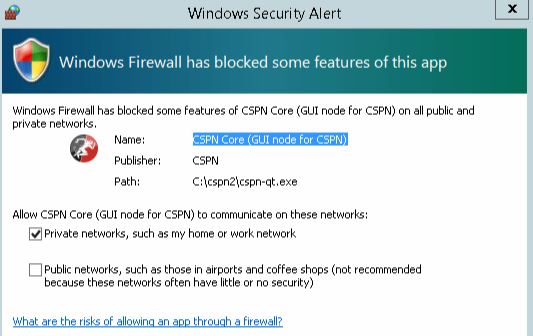
You will get a Windows Securty Alert, this is Windows firewall asking if this app is allowed. Click agree to continue.
The wallet should sync up pretty fast as the blockchain is new. Once Sync’d you are ready to send your coins to your wallet in preperation for your masternode.
What are Hot and Cold Wallets and what is this to do with Masternodes?
Hot wallets are online and connected to the internet 24/7 with a public IP address. These are the wallets that help the coin community to support the blockchain of that given coin. These have no coins in them and so have nothing to have stolen.
Cold wallets are what hold your coins and can be swicthed off once the masternode is started to help protect your coins. However this does mean your wallet will not be able to stake coins and so no staking rewards from Masternode earnings. There are ways to get around this but thats another story.
If you are going to setup a Windows Master node this is the only way i would recommend doing it. I would not recomend holding coins in online wallets 24/7 open to the internet, even if behind a firewall.
However, this setup works great if you have an old PC that you can put at a friends or relitives house and use there internet connection. Free hosting! just offer to cut them in when the coin MOONS! A quad core 8GB RAM cheap PC can handle about 8 different coin wallets at the same time
How do i setup a Windows CSPN Masternode?
The first step it to get our wallet ready that will host our coins, receive payment and start the masternodes.
At this point i am assuming you
- have a sync’d 2.0 wallet for Hot and cold wallets
- Have 1350+ CSPN coins in the cold wallet
- Have a public IP to host the Hot wallet
Start by turning on “Coin Control features” you will need this to move coins about from specific address inside your wallet
- Select “settings” from the drop down menu at the top left
- Click “options” and select the “Wallet” menu
- Tick the box “Enable coin control features”

Next we have to open the CSPN Masternode setup tool in a browser so we can copy and paste text from the wallet to the tool and back again, basically on the same machine.
Click here CSPN Masternode Setup Tool have this open in the background
Creating a CSPN Segwit Payout Address
Just like Bitcoin, CSPN uses Segwit paymaent addresses, these start with the number “3” to show it is a Segwit address. This new address is used for the payouts and fees for your node. You must always keep between 1 and 10 CSPN at this address.
From the “Tools” menu, open the “console” and copy and paste the following “getnewaddress Payout p2sh-segwit”

This new address (notice it starts with the number 3) can be found in the “Receiving Addresses” list found under the “File” Menu. It will be called Payout, you will need this address later to input into the CSPN Masternode Tool

Send 1-10 CSPN to this address depending on the amount of Nodes you will be hosting from this wallet. So far i have found 1 CPSN per node seems OK.
Sending the CSPN Masternode Collateral Address
Create a new address from the “Receive” Menu and then click “Create new receiving address”. At this point you will notice it has no label.

Back to the “Receiveing Addresses” menu you can name it something sutable. Right click the address with “no label” and name it. Mine is called MN2 for my second Masternode.

Send the CSPN Masternode collateral (1337 coins) to this new address. Not 1336.9 or 1337.2 It HAS to be spot on 1337 included in a single transaction because you can’t have a combined total of 1337. From the “Send” menu, copy and paste in your MN2 address, fill in the amount of 1337 coins. Hold ya breath and click SEND.
Notice that the “Subtract fee from Amount” is NOT ticked

Create another address and call it something that links it to your Masternode you just created. I will call mine “MNO1” O, not Zero. O is for “Owner Address” and you will need this address to input into the Masternode tool. This keeps your addresses easily identifiable.
The Owner Address is used to prevent others from taking ownership of your masternode. The CSPN Team will also use that same address for voting rights on governance votes as well. You MUST have one Owner Address per Masternode.

Generating the TXid
The first step here is to retrieve the “masternode outputs” information. This is in the format of a larger sting of numbers and letters, simulare to an coin address but longer and with a 0 or 1 at the end. This is called the “txid” or Transaction ID followed by the Index number.
Goto the “Tools” menu, then click “Console” and enter in “masternode outputs” You should get an output like this, copy this address to a file and keep safe in a different location to your masternodes.

Configuring using the CSPN Masternode Setup Tool
We now have to take all the information about our node and enter the information into CSPN Masternode Setup Tool. This will give us the configuration files that we can use on our Windows Hot and Cold Wallets
Review the screen shot of the Tool, match up the fields with the information about your node.
- Collateral txid and Index = This is the long address generated by “masternode outputs”
- Server IP and Port = The Static public address for your master node along with the port number it will use. Defualt port is 13370
- Owner Address = The Address you created and called “MNO2”, this is the voting address
- Payout Address = The Sigwit Payout address you created starting in 3
- Fees Address = Can be the same as PayOut address or you can create a dedicated one
- BLS Public Key = Not required for Windows wallet for this setup

Once you have all your information “copy and pasted” (never type out those long addresses) in and DOUBLE CHECK IT!!! And then press “Generate”
Entering the Configuration Data from the masternode Setup Tool
The tool should not be presenting you with 2 boxes of text to copy. If not go back and check all your data is correct and try again.
I would have liked to see this next screen in reverse order as thats the order you need to complete the tasks in, the dispayed order is confusing.
Scroll down to “Copy & Paste the following settings into your cspn.conf on the MN Server”
You will find the “cspn.conf” file in the C:\CSPN2\DATA folder, if you had followed my recomendation above, or it will be where you decided to install the Blockchain data.

Copy the data into the config file of your “HOT wallet” and restart your wallet so the new CONF file is used to set your wallet as a masternode. Once started and Sync’d up again proceed to the next step
Back on the Masternode Setup Tool page, Scroll to the “Copy & Paste the following command into your wallet console” and copy the text to input for your MN2 node. On your “Cold Wallet” that has your coins for collateral, Payout and staking (if you wish to do that) Enter the copyied commands.
Before you copy and paste your commands in, you need to unlock your wallet. You will notice that the “Unlock Wallet” has been removed from the “Settings” menu as the team though that using command line to unlock the wallet is safer for your coins, and i cant argue with that!
use the command “Walletpassphrase” “Yourwalletpassword” “600”
“Yourwalletpassword” = The pass phrase you used to encrypt your wallet
“600” The number of seconds to keep the wallet unlocked. This is 5mins and should be plenty.
Navigate to “Tools” the “Console” and unlock your wallet then paste in the commands and hit enter

If you receive anything other than another long string address you have made an error. If you get an error code you can ask on the Discord channel for help but first i would allways recomend just resetting and doing the setup again.
Checking your Windows CSPN 2.0 Masternode is Online
Click the “Masternodes” tab at the top of the wallet and you should see a list of 500+ masternodes. Tick the box “My masternodes only” and you should see your node

Here you will see:
- Address – Your MN IP address
- Status – Enabled. This means its running
- PoSe Score – Proof of Service. This is calculated based on your MN presence on the network. Lower is better, Zero is great!
- Registered – Block Height at when the masternode was first registered
- Last Paid – Block Hieght of last payment
- Next Payment – Block Hieght of next payment
- Payee – Address for MN payments to be sent to
- Operator Rewards – Can be used to send a % of a reward to the Operator at a different address
Masternode POSE_BANNED
Each failure to provide service results in an increase in the PoSe score relative to the maximum score, which is equal to the number of registered masternodes on the network. When your MN gets close to this score your node gets banned from the network and as a result goes offline untill the issues are resolved.
The only way to resolve this is to improve your ping times to the network.

Things to check
- Connection to the Network is consistent
- Packet Losss is low
- The line is not over used and flooded
- Your Firewall is not blocking packets
CSPN 2.0 Masternode Setup Guide – Comments
I hope you found this CSPN 2.0 Masternode Setup Guide useful, any correction or addition you think may help others with there setups please post a comment below
11th November 2021 @ 12:13 pm
home-mining.com is interesting
https://cryptoxinos.blogspot.com