Table of Contents
Some great steps to increase electricity efficiency while CPU Mining could save you up to $6 a Month per Mining Rig. Depending on your setup you may save even more!
One of the first things I would recommend any serious miner to buy is a Watt Meter. This will give you the actual power draw at the wall of a given item that is plugged into it. In early stages of mining, you don’t need anything fancy, just something that is good enough to see a 10w power swing either up or down.
Once you get into power consumption a bit more then splash out on a more sensitive watt meter with more option.
How to reduce power consumption while CPU Mining
One thing to note while making your mining rigs more efficient, some CPU Mining algorithms may get affected by undervolting and so you should follow this process for each coin you mine and test, as they may produce different results.
- Buy only Gold or Platinum Spec PSUs – Covered on Best PSU to Buy for Mining
- Reduce the Core Voltage (vCore) of your CPU
- Reduce the Voltage of your Memory
- Review your Rig design
What is the test rig?
The test rig is at stock speed and setting, nothing tweaked… yet
At this point, PLL Overvoltage and EPU Power saving are disabled.
- CPU = Intel Ivy Bridge 3770K – 3.5Ghz
- Mobo = ASUS P8Z68-V PRO GEN3
- Memory = 16GB (4x 4GB Sticks) Corsair DDR3 2000Mhz Memory CMX8GX3M2A2000C9
- Storage = SSD Drive
- Using the CPU, GPU = HD4000
Software used
- CPU-Z
- CPUID-HWMonitor
- XMRig v6.16.2 Mining RandomX Monero (Via NiceHash Mining Full App)
How to reduce the vCore of your CPU and what will happen if i do?
NOTE: ALL CPUs are different not only due to the silicon lottery but in spec as well. Some CPUs standard voltage is v1.6, some are v1.1. You will need to adjust your settings according to your CPU but use the same principle I am using here. Always use small increments at a time and test before moving to the next setting.
Reducing the vCore (Voltage) of your CPU can help reduce its power draw and in turn reduce the amount of electricity it consumes. This will also reduce the amount of heat the CPU cooler need to dissipate and so the CPU fan will spin slower and so in turn using less electricity. On the down side it will also cause your computer to crash if reduced too far so you need to find that happy balance.
You will need to install CPU-Z and CPUID HWMonitor on your rig. If you also have a wall plug Watt Meter that also would be beneficial.
- Take a screen shot of your idle CPU usage and the amount of Watts is consumes from the Watt meter and Temps from CPUID
- Take a screen shot of your CPU under Mining load, Watts is consumed from the Watt meter and Temps from CPUID
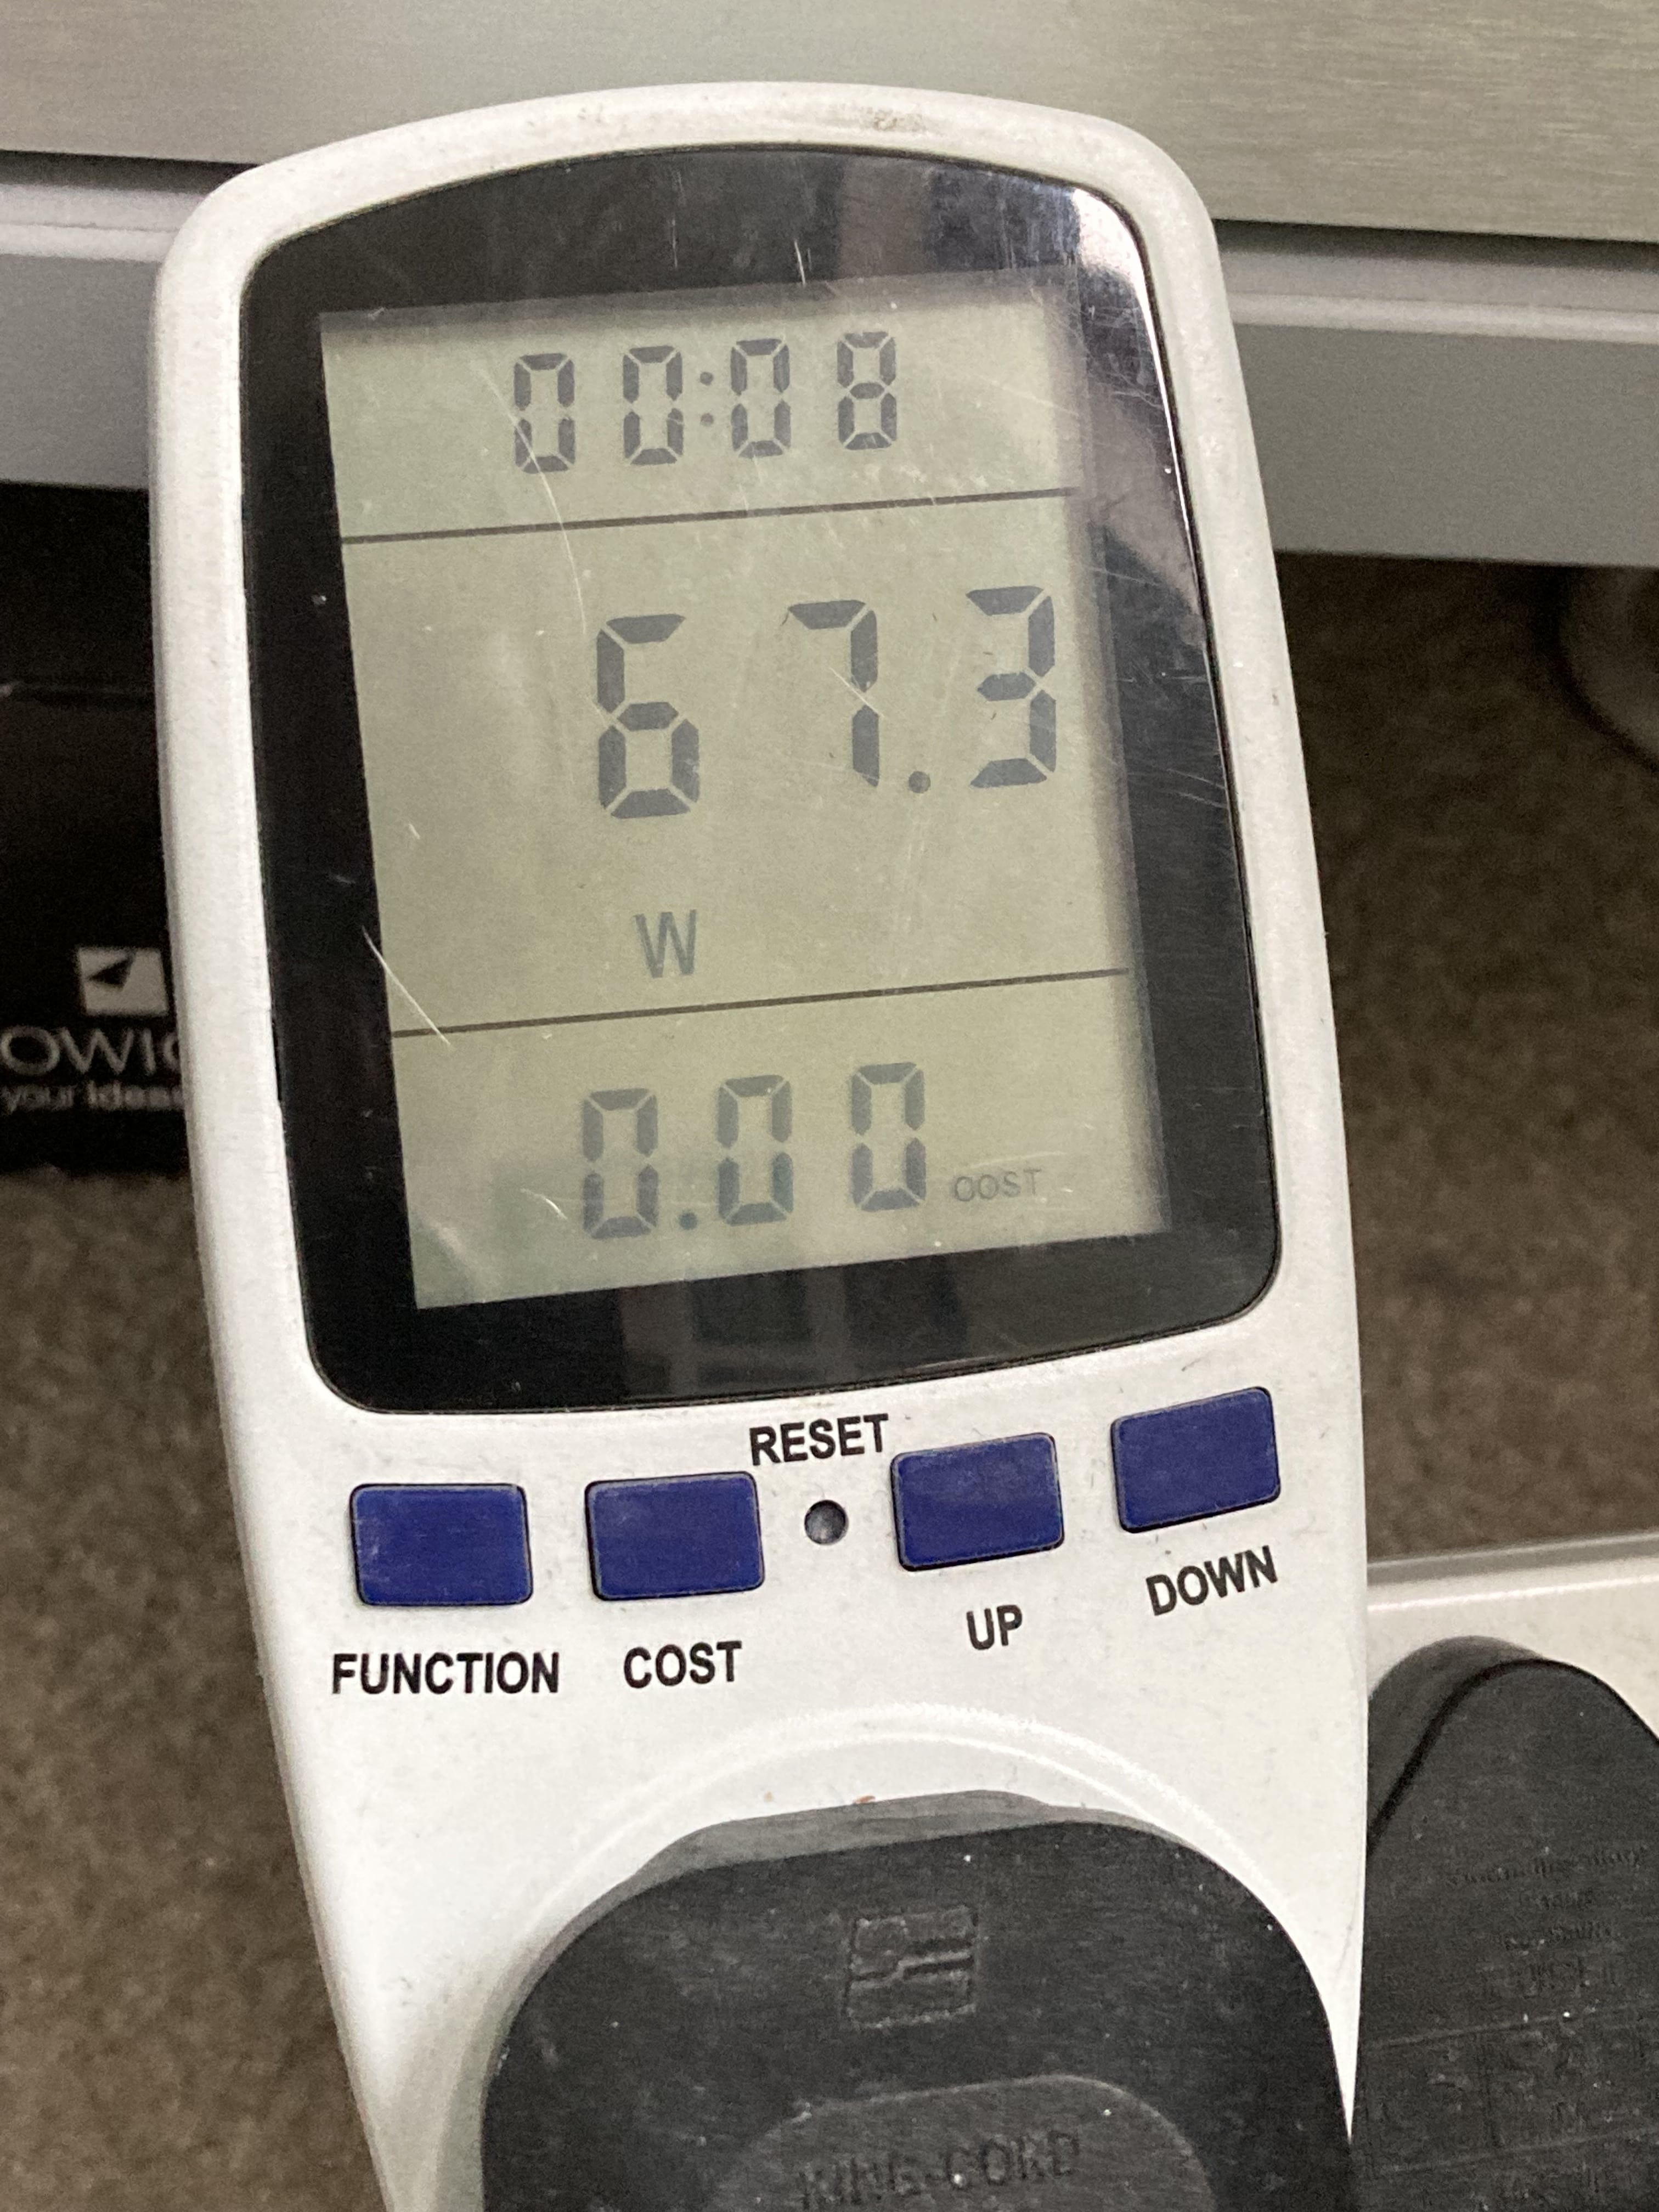
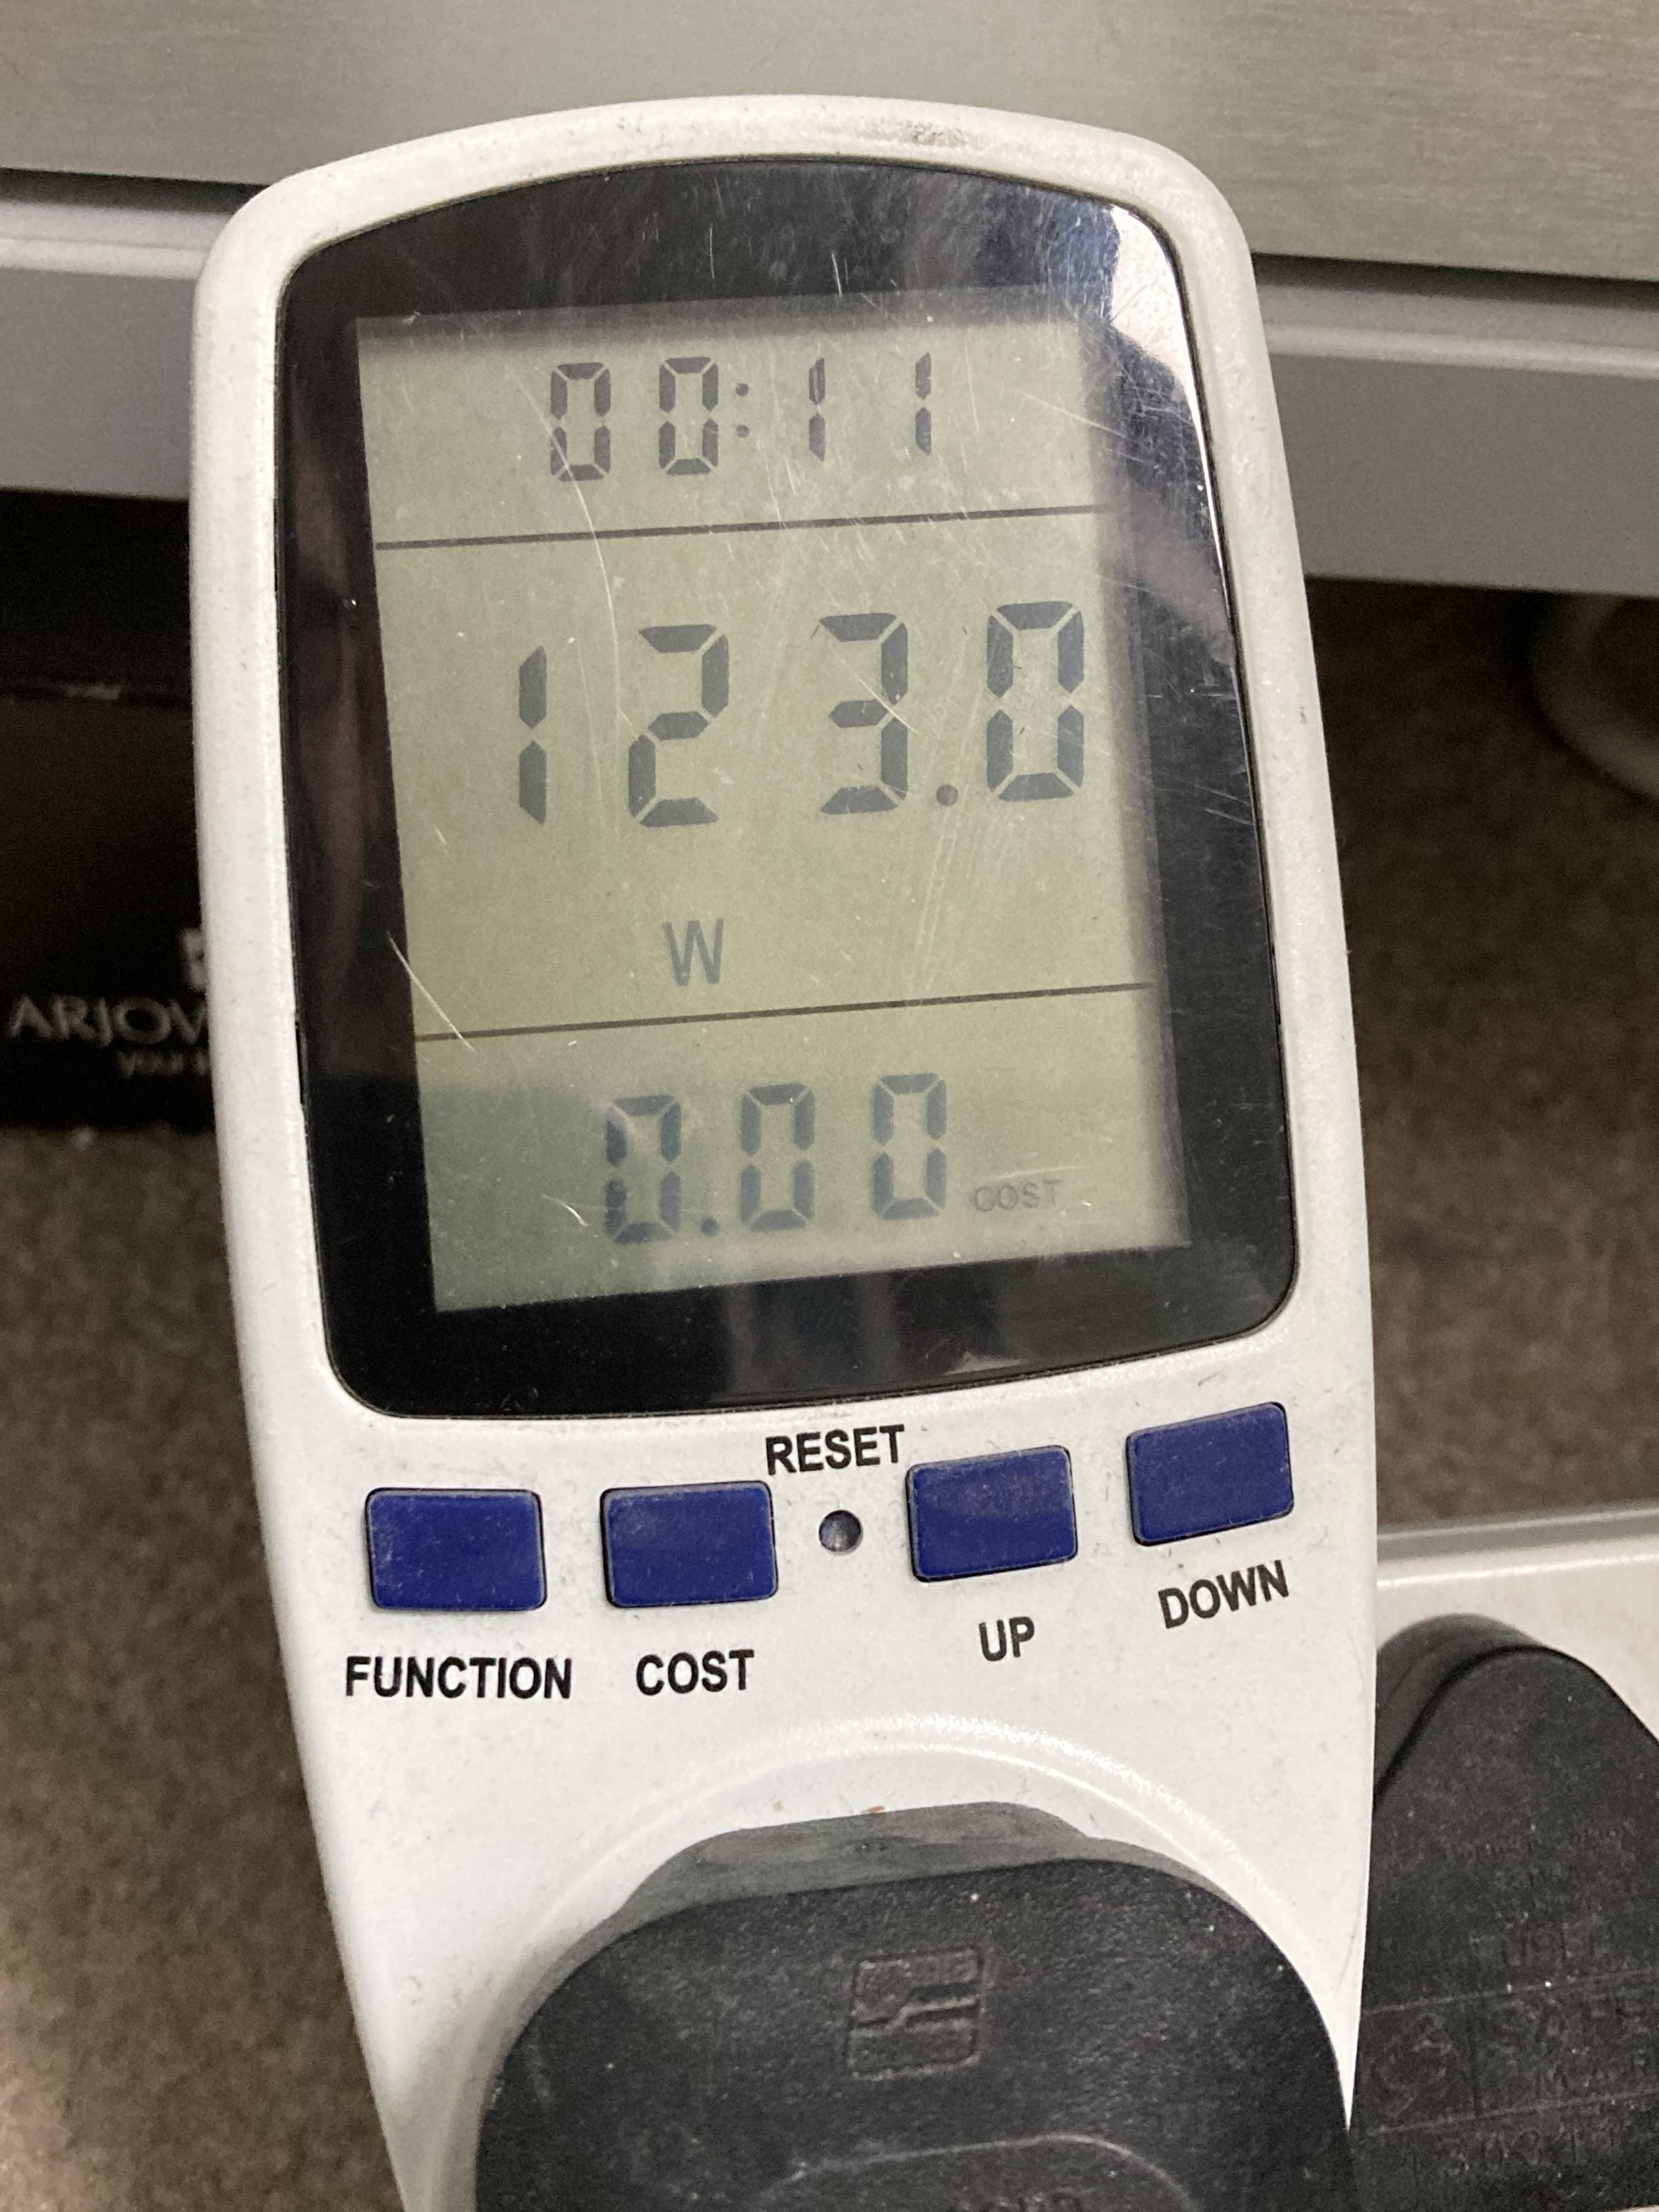
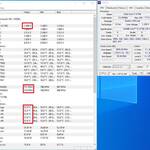
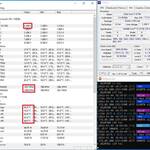
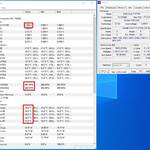
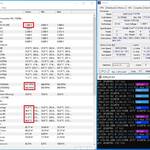
We can see here the Rig is using 66watt idle and 113w while Mining XMRig v6.16.2 Mining RandomX Monero Coin. (RandomX will only use 4 cores due to the cache size of this CPU). Notice the highlighted boxes in red, these are the important values we need to monitor. These will give us the before and after results.
- CPU vCore – When this drops, we know the BIOS change we make has taken effect
- CPU Fan Speeds – Reduced speeds means less power, less heat and less noise
- CPU Temperatures – Reduced temps means less power being consumed
Now we can start to reduce the power. Reboot your rig and enter the BIOS, this is done different ways on different manufactures, most with respond by tapping DEL on start-up, around the time of the first POST beep that you hear.
Once in the BIOS, you are looking for a setting called CPU Volatge or vCORE, normally in the tweak or overclock area. The ASUS is set to AUTO and that gave us the v1.2 we could see in CPUID.

On the line where it says AUTO, start reducing the voltage by 0.1 at a time. Mine started at v1.2, so I would try v1.1 and then v1.0 and then v0.9 until the computer will not boot into windows normally. If you want to get the very best setting then use 0.01 intervals until you get a stable under-volted system.

Once you can boot into windows without a crash, load CPU-Z and CPUID and check the readings against the earlier ones. Check Both idle and on Load, start your CPU Miner again and let it run for around 15mins to get stable temps and fan speeds etc. RandomX tends to go full 8 Cores at launch then level out with just 4 cores, this is due to this CPU design.
Power Consumption Under-Volt: 61watt idle and 98w on Mining load
From UnderVolting the Intel 3770K CPU we managed to save 6Watt on idle and 25Watt on Mining. That could be as much as $4 per rig per month saving on the electricity bill.
How to Undervolt your Memory to Reduce Power Usage
Leaving the vCore setting on the CPU at v1.0, we have a reference point at 61watt idle and 98watt under load. We can take note of the memory voltage and use this as the starting point for our memory undervolting, Corsair DDR3 2000Mhz Memory CMX8GX3M2A2000C9 runs stock at v1.65

Enter your systems BIOS as you did before and look for the Memory voltage setting. Im going to start stepping mime down in v0.1 increments until my rig is unstable, then increase the voltage back a little for a stable system.

After testing a few voltages my system became stable at v1.375 (displaying v1.84v after a reboot) with power draw at the wall showing 59 watts on idle.

After running the XMRig again for around 60mins I was happy this was stable and I kept with this setting. Power draw while CPU Mining at the wall showing 95 watts, but I did see it go as low as 94.1 watts.

This has not changed my CPU Mining speed on RandomX at all and remains around 2600 H/s on the Intel i7 3770K at 3.9Ghz
UnderVolting the Memory from v1.65 to v1.375 we saved a further 2Watt at idle and 3watt under load.
Does Memory Speed Effect Power Usage?
Yes, it does. Memory speed consumes power, so if we reduce the Memory speed by 50%, we will also see a power reduction. However, this might not be what you are looking for as this can also reduce your mining speed for some coins, RandomX and GhostRider for example heavily reliant on memory speed as well as CPU speed.
I reduced the memory speed on the 4x 4GB Corsair DDR3 2000Mhz Memory down to the lowest setting, 800MHz. We also see a nice bonus of reduced temperatures. At this point we could try reducing the memory voltage even further, its always worth a try if applicable to your situation.
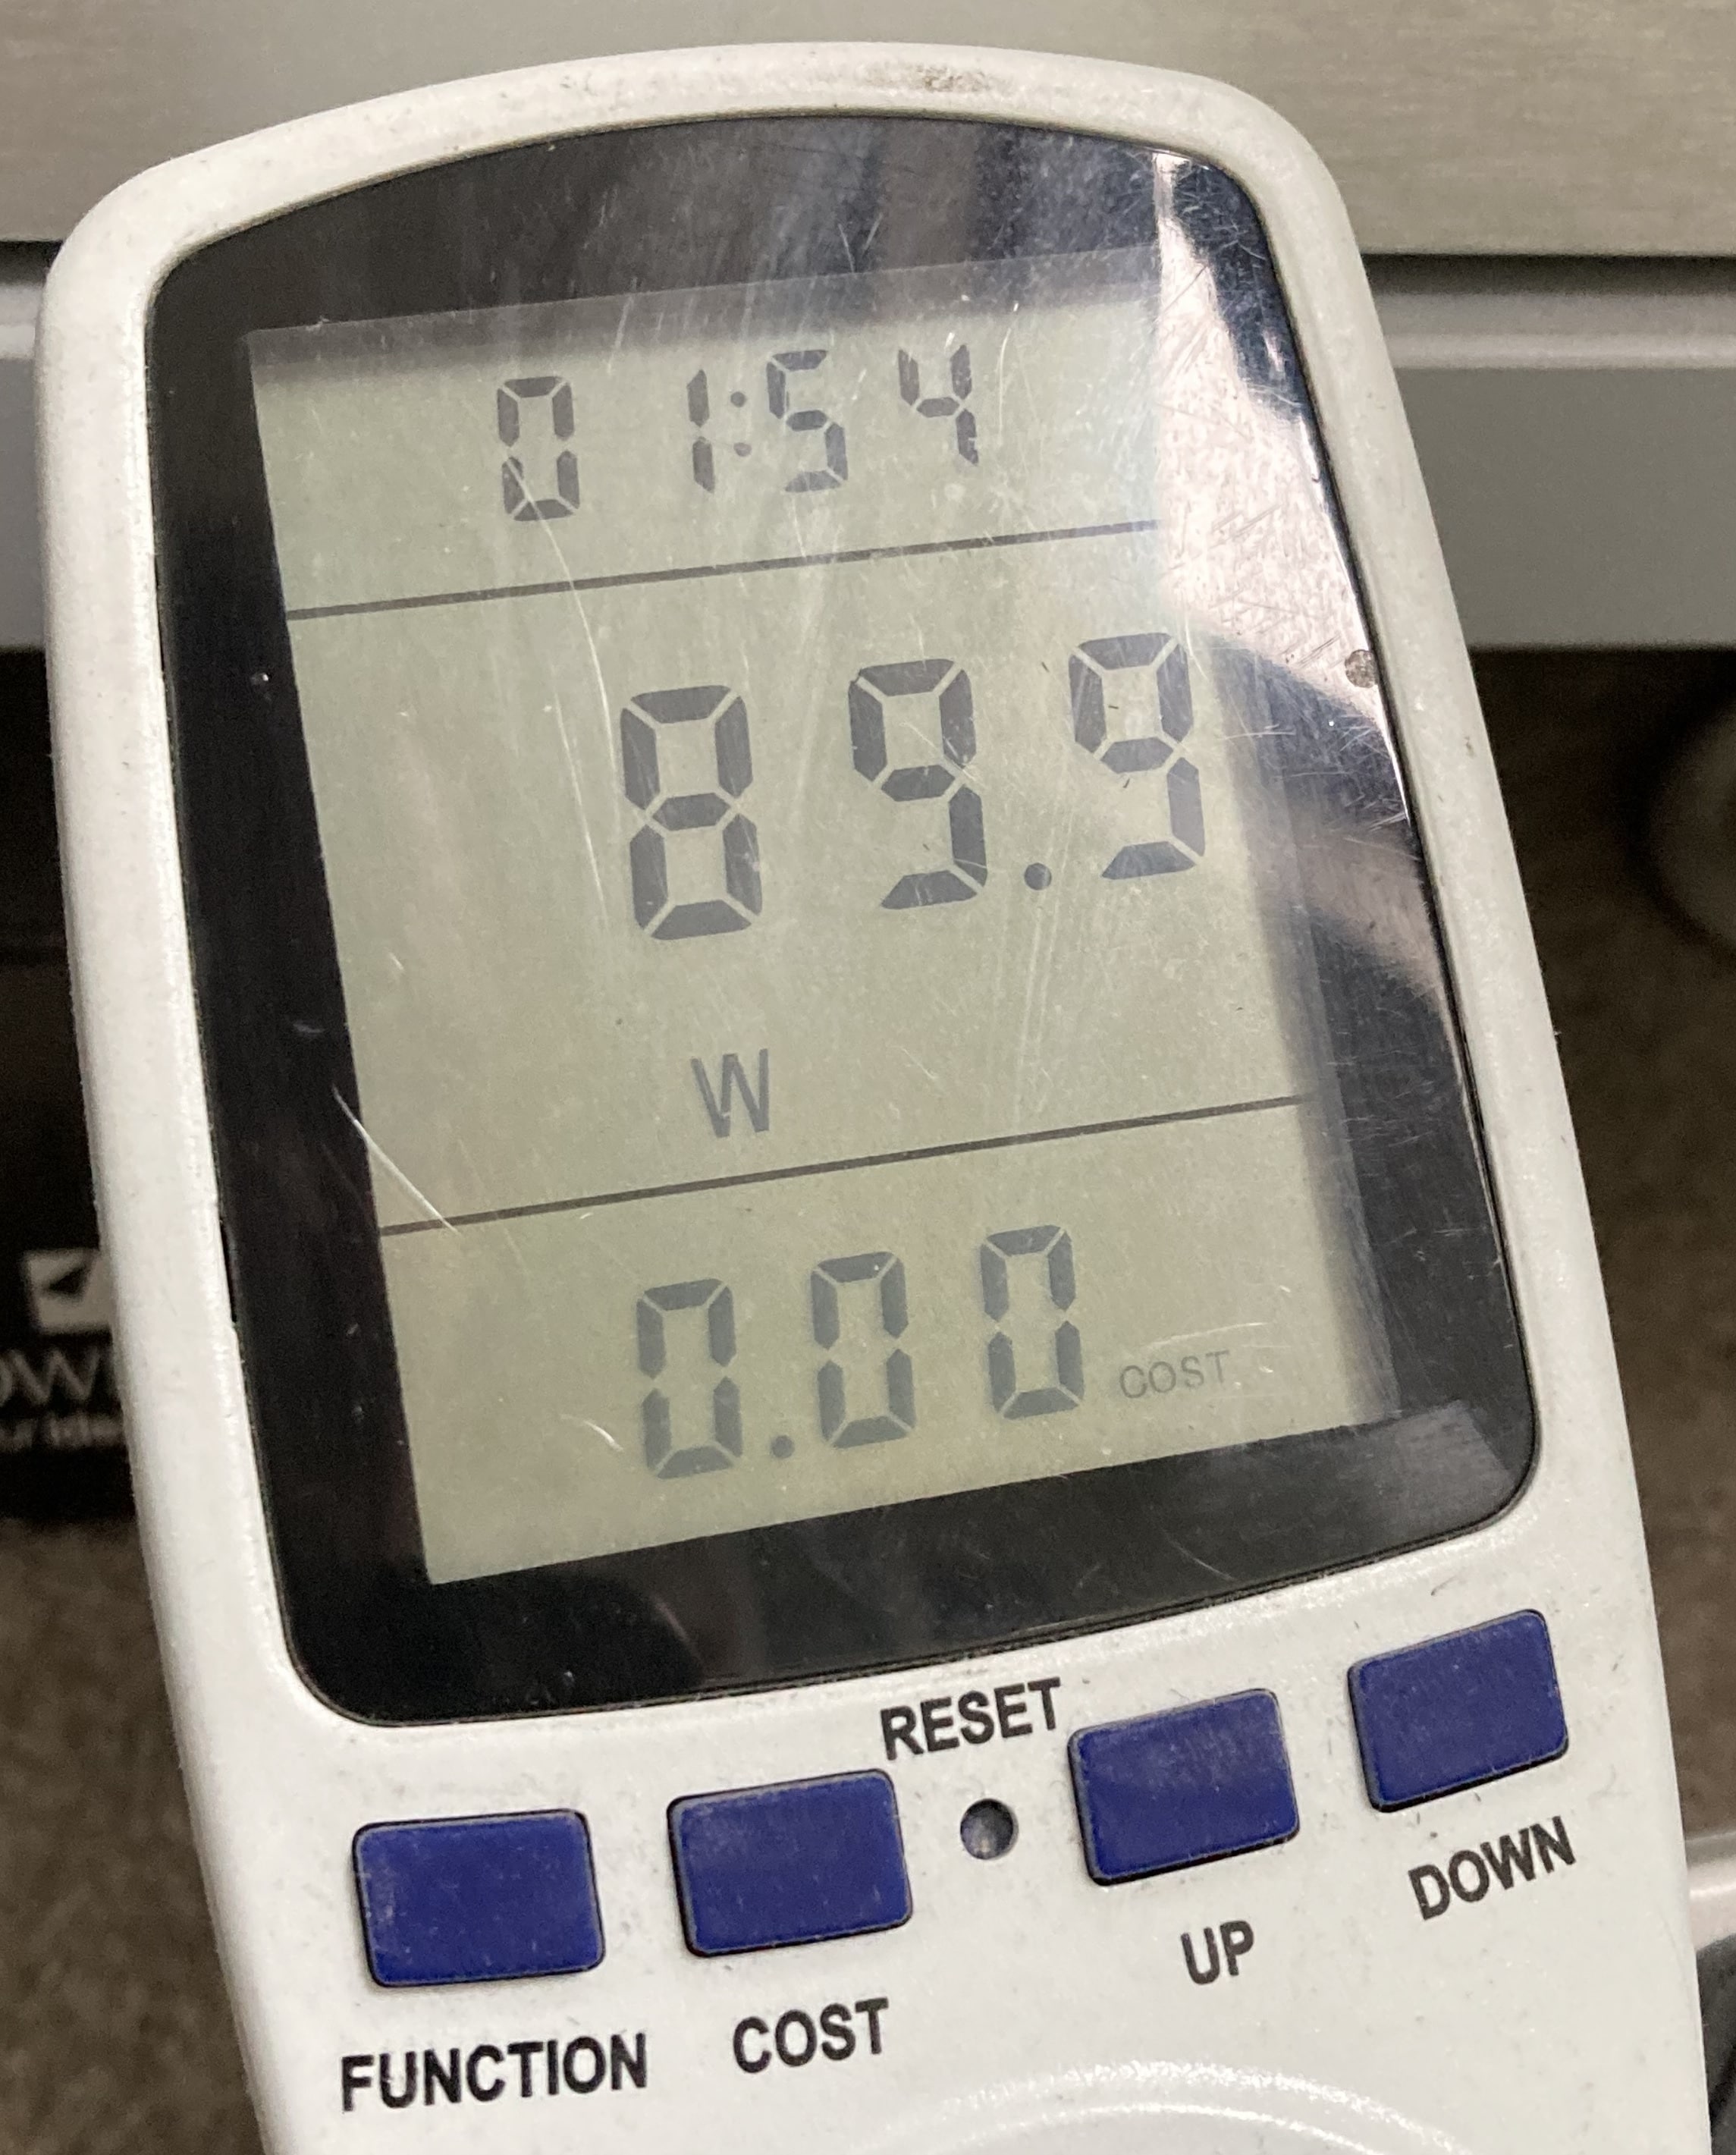

I was impressed we had a further reduction in power usage and now down to 90watt at the wall. The drop in CPU Mining Speed was not what i was looking for, it dropped from 2600 H/s to 1900 H/s. This might be a great tweak for an Reducing the power of a GPU Mining Rig but not for CPU Mining Rig on RandomX or GhostRider based coins.
For an efficient CPU Mining Rig, we need to reduce the power consumption but keep or increase the Hash Rate of mining.
Does reducing the amount of memory modules in a Mining Rig reduce Power Usage?
Yes it does. I removed 2 out of the 4 modules in this Mining Rig, the power usage reduced further to 55 watts on idle and 84 Watts on test Mining RandomX. This is still on the reduced speed and voltage settings of the RAM.
Mining with XMRig on RandomX for Monreo Coin producing different results depending on your memory config. I looked closer at Memory configuration while CPU Mining but essentially, we are looking to keep the hash rate at 2600 H/s and reduce the power as much as possible, seen here in BOLD was my best settings
- 4GB, 1x Single Channel (1.375v) – 960 H/s 54Watts idle, 80Watts Mining
- 8GB, 2x4GB in Single Channel (1.375v 800Mhz) – 1550 H/s 55Watts idle, 86Watts Mining
- 8GB, 2x4GB in Dual Channel (1.375v 800Mhz) – 1980 H/s 57Watts Idle, 87Watts Mining
- 8GB, 2x4GB in Dual Channel (1.65v 2000Mhz) – 2600 H/s 61Watts Idle, 95Watts Mining
- 8GB, 2x4GB in Dual Channel (1.375v 2000Mhz) – 2600 H/s 57Watts Idle, 92Watts Mining
- 16GB, 4x4GB in Dual Channel (1.375v 2000Mhz) – 2600 H/s 61Watts Idle, 95Watts Mining
Review your Rig Design, how can I further increase Efficiency?
Once your Rig is stable and running perfectly for a few days, its worth taking a step back and reviewing other elements in the setup to reduce power further.
- In the BIOS, Disable all features on your motherboard you are not using. Soundcard, ports, SATA controllers and LED lights
- Check the 8x Delta Fans actually make a difference. Try turning off the fans one at a time and record the difference in heat and watts used.
- Change the position of the fans
- Swap the 8x Delta’s for lower wattage fans if you can
- Swap the 80mm fans for a larger 120mm fan to reduce wattage to air flow ratio. These are also quieter
- Is the air flow all in the same direction – Do not mount case fans pointing at exhaust points on the CPUs or GPUs, try and arrange all fans in the same direction
- Replace Hard Drives with Solid State Drives, Small SSD are cheap and there are plenty used on eBay
31 Watt Power Reduction on our CPU Mining Rig!
Here is an overview on the before and after power consumption on the test rig. Amazing result for the time involved. Now to apply to the other 9 Rigs for a Total of 310 Watts Saving
| At Idle | Mining | Total Saving (Watts) | |
|---|---|---|---|
| Stock Settings | 67 | 123 | |
| CPU vCore set to v1.0 | 61 | 98 | 25 |
| Memory Set to v1.375 | 59 | 95 | 28 |
| 2 Sticks of RAM | 57 | 92 | 31 |